Posts

Planning for final piece - Unit 6

Image
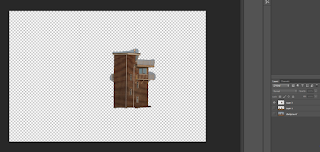
ANALOG: Using what I have learnt from the 3D analog test, I will be creating a more neater and planned out final piece. First I will start with the digital side by editing an image to have the separate images for the different layers. I will take the image and copy each segment of the image that I want as a layer and paste it as a new layer to then be able to print that separate layer. After I have edited the layers, I will print each layer off and then cut out the top and second layer as they are the only layers that will need to be cut out. Then I will mount each layer on foam board to create the depth and give the illusion of the building and ground a sense of physical presence. Finally I will then stick those three layers together so they are layered and then give the illusion. The top layer: The second layer: The background/bottom layer: After creation brief summary: Creating this had its easy parts but also its difficulties, one of the difficulties was cutting the

Research - Unit 6

Image
This 3d layered photo that is in the frame is just simply the same image multiplied but with the subject cut out and layered on with the skateboard that is in the image cut out and layered on top of that as well this technique tends to be used with cards to give the image on the front an illusion of it being 3D. For my image I will take aspects from this an apply them to my idea. The parts I will take from it will be the multiple layered images but mount them together in a different way to how they have in these images. In the images they used adhesive foam squares where I will use foam core or adhesive foam board to mount them and raise one from the other. Other ideas that I have found out about are holograms that  consists of 4 images with clear plastic or glass in the shape of a pyramid, with the tip end down on a screen. The screen then reflects onto the clear plastic giving the illusion of there actually being a physical object. This idea can be used for even videos tha

Context - Unit 6

Image
This Unit allows you to show practical skills with the analog side of things more, as well as the digital side showing more of your software skills with editing the images or image to end up how you want it to be. A 3D or 3 dimensional image is an image that gives off the illusion of a physical presents, this means that for an image to be 3D it needs to give the illusion or effect of being a physical thing. To make sure that the image that I create has that desired effect of looking 3D, with this I will also make sure that other people feel that it has that illusion and not just me. An example of 3D photography could be a hologram that consists of 4 images with clear plastic or glass in the shape of a pyramid, with the tip end down on a screen. The screen then reflects onto the clear plastic giving the illusion of there actually being a physical object. Another example is taking a picture of someones head from both side, face on and from the back and then editing those images toget

Lenticular 3D - Unit 6

Image
Lenticular is a 3d form of photography allowing you to show two images on one print. This is done with triangular prisms side by side with one image on one of the surfaces and another on the other side.  

Evaluation - Unit 7 Time

Concluding all of the work I have done for Unit 7 - Time, I learnt a few things and gathered some skills that will be useful in future projects. One of the things that I learnt was to make sure that your tripod and camera are as steady as can be when you are taking a timelapse otherwise you will end up with unwanted movement in the end product that you cant edit out, so making sure nothing is going to knock the tripod or camera, the tripod it fully stable with no wobble, and that its all locked into position so very little amount of things can actually effect the stability and position of the tripod and camera. I learnt this the hard way as I show a timelapse and didn't notice until in the editing phase that there was a slight change in positioning of the camera and tripod, so I went back another day and re-shot that timelapse as I didn't want that at all in the end product. Doing multiple timelapses also gave me more patience with things which is sometimes the key with differe

Evaluation for Final Piece - Unit 7 Time

For my final piece I created a motion time-lapse which showed the movement of cars on a dual carriage way.  I searched online for other time-lapse that displayed movement in them as well as looked at other time-lapse that I have created for inspiration on what to capture and how to do so.  The practical skills I used for this were using a camera with a tripod as well as video editing software.  This has allowed me to create time-lapses faster as well as at a better quality.   The problem solving that I had to do was to think of how many shots I needed for how many seconds I needed as well as how long that would take to actually shoot with the 10 second intervals of each shot.  After the experimentation that I did I wrote up about what was good about it and what I needed to improve and why, which then enabled me to re-shoot and create a better, more professional final piece. In  conclusion, doing this project allowed me to be able to create a more professional time-lapse a

Lumen Pinhole

Image
To create this lumen pinhole image I used a cider can to house a single 5x7 sheet of photographic paper. I created the pin hole (hense the name pinhole) with an acupuncture needle as the needles tip is minute and yet strong enough to puncture a hole in the cans side to act as the lens of the can camera. Next you open the can at one end, as close to the rim of the top as possible being careful not to cut your hand on the can or with the tool you decide to use. After you have taken the top of the can off, you need to secure a circle of felt that is about 1-2cm bigger in diameter than the can itself so that it can help create a light proof seal. When placing the light sensitive photographic paper into the can it needs to be done in a dark room due the fact that any light exposed to the paper will result in ruining the paper as the image will just end up as a black over exposed image. Once the paper is in ensure no light gets to it, you then need to seal the end that you opened of the c